Are you ready to enhance your home’s security and convenience? Installing a smart home video doorbell is what you need. Whether you’re a tech enthusiast eager to explore the latest gadgets or a homeowner looking for practical solutions to everyday problems, this guide is for you.
Smart doorbells are just one piece of the puzzle—if you’re interested in a complete home protection setup, don’t miss our list of the Top 10+ Security Gadgets for the Home that can help create a safer and smarter living space.
By the end of this post, you’ll know exactly how to install a smart home video doorbell and enjoy its many benefits.

How to Install Smart Home Video Doorbell? (Short Answer)
- Start by charging or plugging the doorbell’s battery into a nearby power outlet.
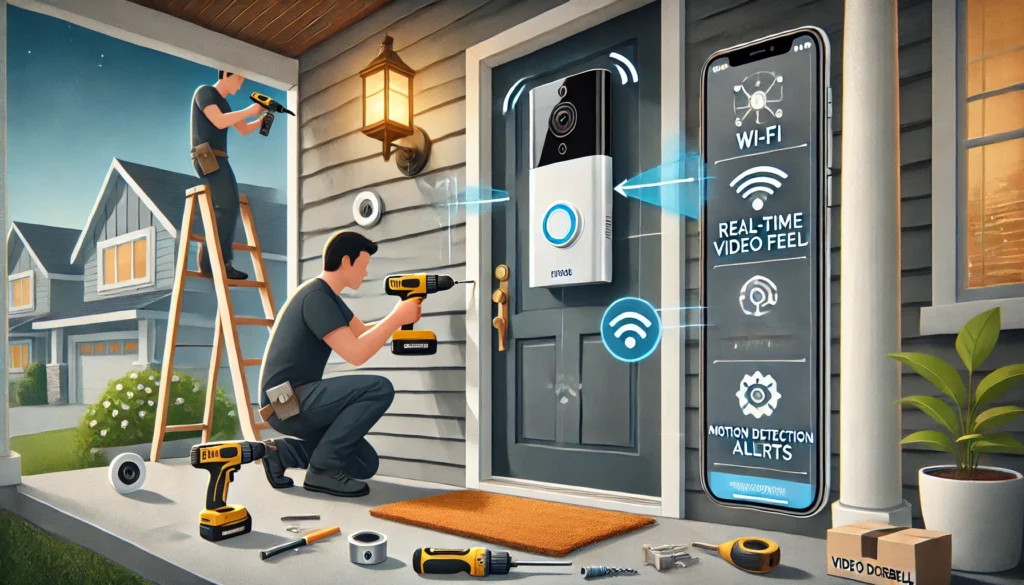
- Mount the doorbell bracket on the wall next to your front door using screws.
- Attach the doorbell device to the mounted bracket securely.
- Download the corresponding app on your smartphone to connect the doorbell to your Wi-Fi network.
- Follow the app’s setup instructions to complete the installation and start using your new video doorbell.
The Buzz Around Smart Home Video Doorbells
Smart home video doorbells have taken the market by storm in recent years. These devices combine security, convenience, and modern technology to offer homeowners a better way to monitor their front doors. Unlike traditional doorbells, smart video doorbells allow you to see, hear, and speak to visitors through your smartphone or another connected device.
Why You Need a Smart Video Doorbell
Before we get into the installation steps, let’s explore why you might want a smart video doorbell in the first place. Firstly, these devices significantly improve home security. They provide real-time video feeds and motion detection alerts, helping you monitor your property even when you’re not home. Secondly, they add convenience; you can interact with delivery personnel, welcome guests, and even deter potential intruders without opening your door.
Choosing the Right Smart Video Doorbell
The first step in your installation process is selecting the suitable video doorbell for your home. Various models are available, each with unique features. Some popular brands include Ring, Nest Hello, and Arlo. When choosing a model, consider factors like video quality, field of view, night vision capabilities, and compatibility with other smart home devices.
Tools and Materials You’ll Need
Now that you’ve chosen your doorbell, it’s time to gather the necessary tools and materials. Generally, you’ll need a screwdriver, a drill (if mounting on a hard surface), screws or anchors, a level, and your smartphone. Some video doorbells come with installation kits, including all necessary hardware.
Preparing for Installation
Preparing your work area before you start drilling holes is essential. Begin by turning off the power to your existing doorbell at the circuit breaker. This step is crucial for your safety. Next, remove the old doorbell by unscrewing it from the wall. Keep the wires exposed, as you’ll need them for your new installation.
Mounting the Doorbell Bracket
The next step involves mounting the doorbell bracket to the wall. Use a level to ensure the bracket is straight, then mark the screw holes with a pencil. Drill holes at the marked spots and insert anchors if necessary. Attach the bracket to the wall using the screws provided. Make sure it’s securely fastened.
Wiring the Doorbell
With the bracket in place, it’s time to wire your new video doorbell. Connect the wires from your old doorbell to the terminals on the new one. Most video doorbells are designed to work with existing wiring, making this step relatively straightforward. Once the wires are connected, tuck them neatly into the wall to avoid interference.
Attaching the Doorbell
Now that your wiring is complete, you can attach the video doorbell to the mounted bracket. Depending on your model, this might involve snapping the doorbell into place or securing it with additional screws. Ensure it’s firmly attached to withstand weather elements and tampering.
Powering Up and Configuring
Turn the power back on at the circuit breaker to activate your new doorbell. Download the corresponding app on your smartphone and follow the setup instructions. This usually includes connecting the doorbell to your Wi-Fi network and configuring motion detection settings.
Testing the Video Doorbell
With everything set up, it’s time to test your new video doorbell. Please press the button to ensure it rings inside your home. Check the video feed on your smartphone to confirm that the camera is working correctly. Adjust the camera angle if necessary to get the best view of your entryway.
Customizing Settings
Most smart video doorbells have various customizable settings. You can adjust the sensitivity of motion detection, set up activity zones, and even change the appearance of the doorbell chime. Spend time exploring these options to get the most out of your new device.
Integrating with Other Smart Home Devices
One significant advantage of intelligent video doorbells is their compatibility with other smart home devices. You can integrate your doorbell with smart locks, lights, and voice assistants like Amazon Alexa or Google Assistant to create a seamless smart home experience.
Maintaining Your Video Doorbell
Perform regular maintenance to ensure your video doorbell continues to function correctly. Clean the camera lens periodically to keep the video feed clear. Check the wiring and mounting bracket for any signs of wear and tear. Keeping your device in good condition will prolong its lifespan and reliability.
Enhancing Home Security with Additional Features
Beyond the basic functionalities, many smart video doorbells offer additional security features. Some models provide cloud storage for video footage, allowing you to review past events. Others offer subscription plans for professional monitoring services. Explore these options to enhance your home security further.
Joining the Smart Home Community
Installing a smart video doorbell is just the beginning of your smart home journey. Join online forums and communities to share your experiences and learn from other users. These platforms can provide valuable tips, troubleshooting advice, and updates on new features.
Conclusion:
How to Install Smart Home Video Doorbell is a straightforward project that enhances your home’s security and convenience. With a few tools and some basic steps, you can set up this device on your own. Once installed, you’ll enjoy the added peace of mind from real-time video and motion alerts. Remember to customize your settings for the best experience. Finally, by integrating with other smart devices, you can create a cohesive and efficient smart home system.
Related Product Reviews:
- Top 10+ Security Gadgets for the Home
- 10 Best Kitchen Gadgets for Home Cooks
- 10 Best Gadgets for the Office
- 10 Best Wooden Cooking Utensils
- 10+ Coolest Kitchen Gadgets
- Top 10+ Satisfying Bed Gadgets
- Top 10+ Cool Gadgets for Gaming Room
- 10+ Best Satisfying Bedroom Gadgets
- 5 Best Smart Switches for Home Assistant
- 3 Best Wifi Smart Locks for Home
FAQs
Check the voltage of your existing doorbell system. Most intelligent video doorbells are designed to work with standard systems between 16 and 24 volts. Refer to the product specifications of your chosen video doorbell to ensure compatibility.
Yes, you can still install a video doorbell without an existing doorbell system. Many smart video doorbells come with battery-powered options or can be connected to an external power source. Look for a model that fits your needs.
Mounting your vid that your doorbell about 48 inches (4 feet) from the ground is recommended. This height provides a good view of most visitors’ faces and bodies. Make sure to angle it slightly downward to capture packages or smaller items left at your door.
A Wi-Fi connection is essential for a smart video doorbell to operate. It allows the device to send and receive data, including video footage, alerts, and notifications. Ensure you have a stable Wi-Fi signal at your front door for optimal performance.
Clean the camera lens regularly with a soft cloth to ensure a precise video feed. Avoid harsh chemicals or abrasive materials, as they can damage the lens. Keeping the lens clean will help maintain the quality of the video footage.